TRANSFER OF PATIENT RECORDS FROM ANOTHER FACILITY

In XP Clinic, it is possible to upload a patient’s entire medical records directly from the facility that refers the patient to Veterio. The module is simple and convenient to use. We encourage you to read the instructions and use it when working with Veterio.

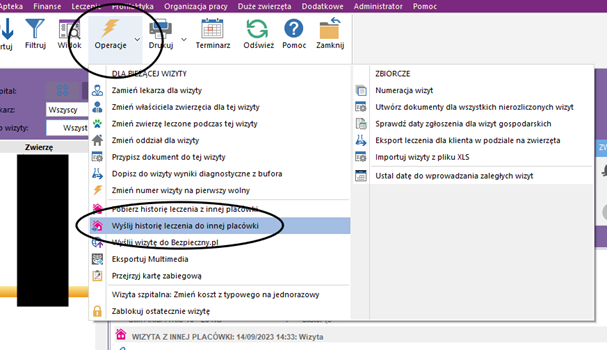
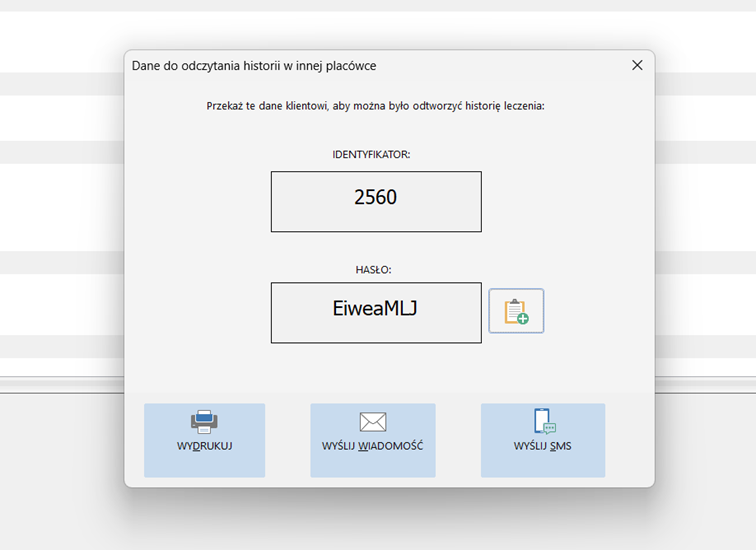
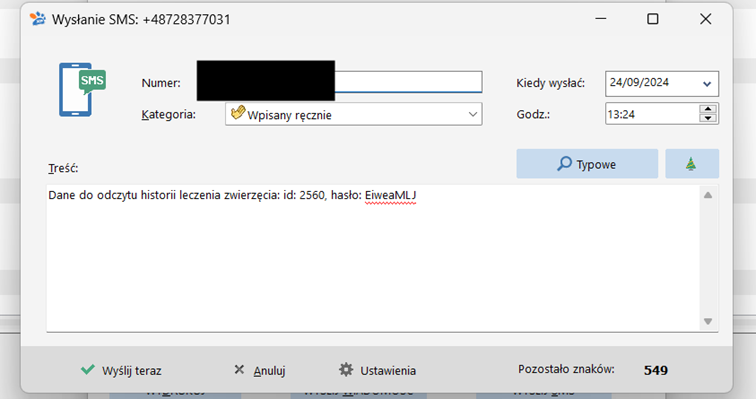
SENDING DOCUMENTS TO VETERIO

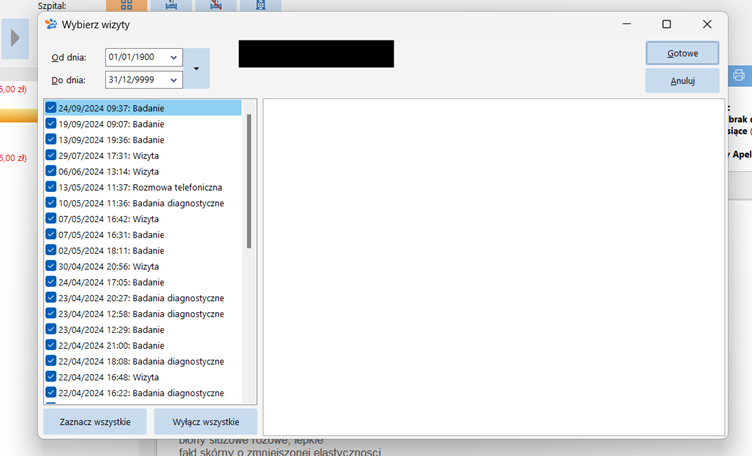
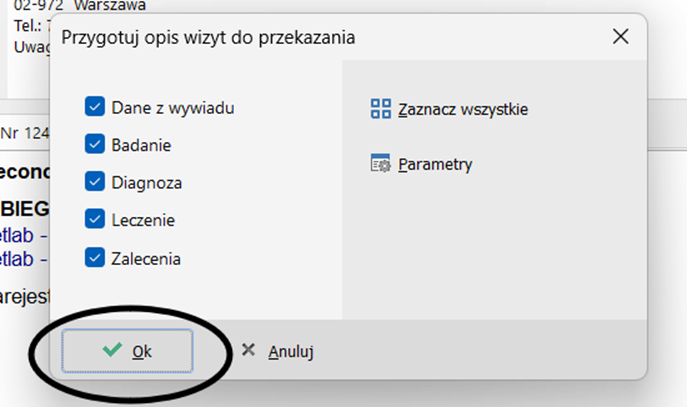
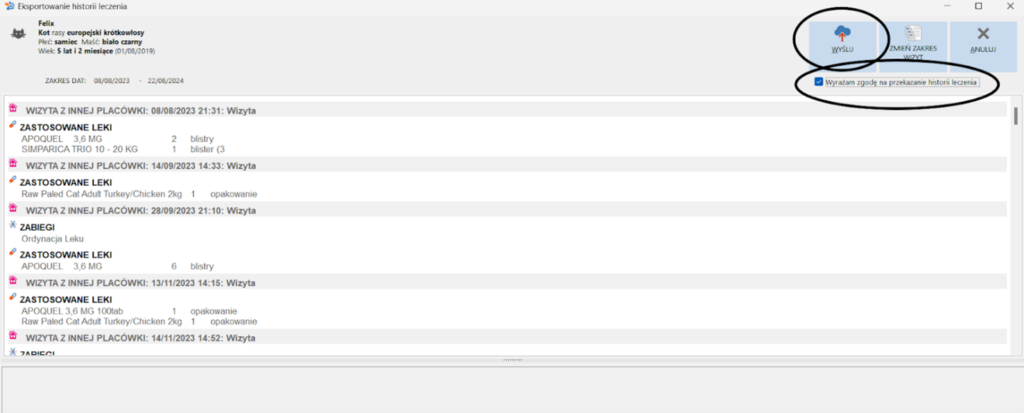
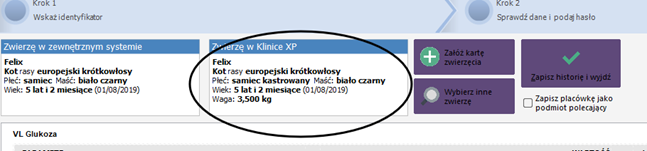
  1. The transfer of records is carried out from the visit level through the operations tab. When doing so, it is important to select exactly the patient whose records you want to transfer. Select “send treatment history to another facility”.

2 A window will appear, in which you need to select the visits you want to send. At first, all of them are selected, but it is possible to send only a part of them. To go to the next step we click:

(3) In the next step, a window will appear where you need to choose what exactly from the selected visits you want to send, for example, only the examination or only the recommendations (immediately all are selected, and ideally it should remain so, because then all the documentation is transferred).

4. After acceptance, another window will appear with a list of selected visits. In order for the transfer of records to be possible, it must be indicated that the client has consented to the transfer of medical history (upper right corner). Without checking this, the XP Clinic will not let us through further. Then we click “submit.”

5. after sending, you will be asked if you are sure you want to send the history – select yes. You will see a frame with an individual login and password for the transmitted data. There is an option to send them via SMS, email or print. The activation code is valid for 2 weeks after downloading. The code should be sent to: recepcja@veterio.pl

As we send the login information, the system will return to the frame with the selected visits. We can click X because all the necessary information is already in the possession of the owner or the facility to which we send.

RECEIVING VETERIO DOCUMENTATION

  1. This can be done from the “visits” level , you do not need to select the patient in question, because in further steps you can set up a card when importing records. Through the “operations” option, you need to select “download treatment history from another facility”.

(2) A window with the path of the procedure will appear, where we need to enter the login. All the information we need to log in will be delivered to your email inbox from Veterio.

(3) After displaying a window with the patient’s data, the period of visits that are sent to us and Veterio’s data, enter the password and confirm it.

4.After this, we will be redirected to the treatment history from Veterio, which we wanted to get. Everything should be there: history, examination description, additional tests, medications used and recommendations. If it’s the first time the patient will be at the facility for a visit at this stage, we can set up a card for him or her, or if we already have him or her, attach the documentation to the card.

Here a patient who already had a card was selected. If we want to set up a new one, the system will redirect us to the path of setting up an owner and animal card.

5 Finally, we click “save history and exit”. This way we have imported the records into our system. In the visits for a particular animal, a pink house marking appears next to the imported tests.